Mastering the Art of Facial Makeup: A Comprehensive Guide to Achieving a Flawless Look
Related Articles: Mastering the Art of Facial Makeup: A Comprehensive Guide to Achieving a Flawless Look
Introduction
With enthusiasm, let’s navigate through the intriguing topic related to Mastering the Art of Facial Makeup: A Comprehensive Guide to Achieving a Flawless Look. Let’s weave interesting information and offer fresh perspectives to the readers.
Table of Content
Mastering the Art of Facial Makeup: A Comprehensive Guide to Achieving a Flawless Look

The world of makeup is vast and diverse, offering a myriad of options to enhance natural features and create a multitude of looks. While trends may ebb and flow, the fundamentals of applying makeup remain consistent, providing a foundation for achieving a polished and confident appearance. This comprehensive guide will delve into the essential steps of facial makeup application, offering a detailed understanding of each stage and its significance in creating a flawless finish.
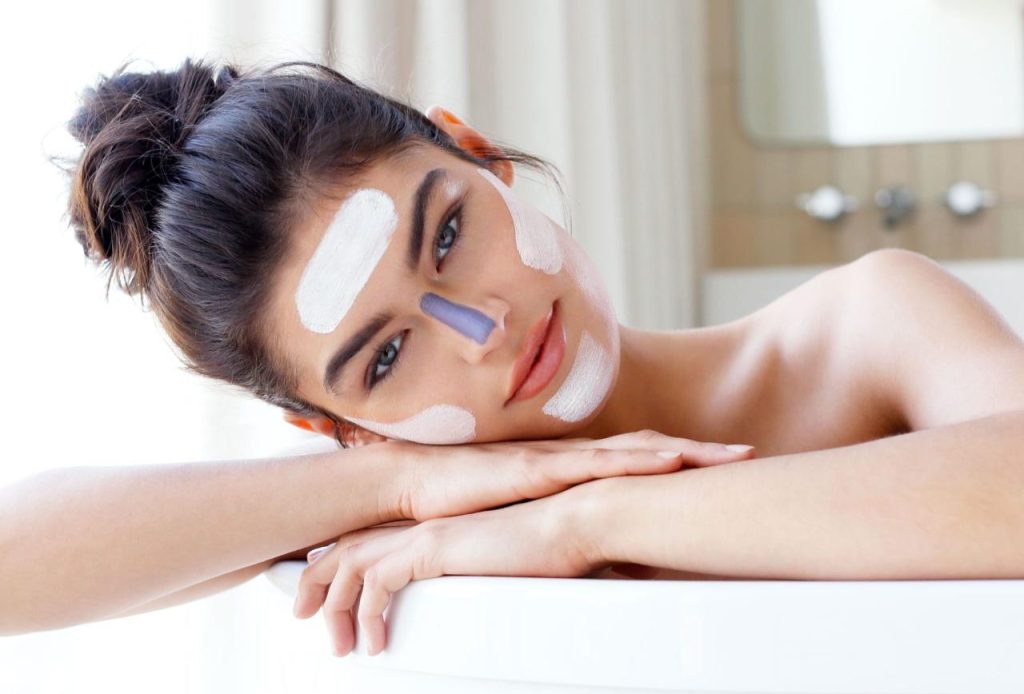
1. Preparation: The Foundation for a Flawless Canvas
Before embarking on the artistry of makeup application, a well-prepared canvas is paramount. This initial step involves cleansing, toning, and moisturizing the skin, setting the stage for a smooth and even application of makeup products.
Cleansing: The first step involves removing dirt, oil, and makeup residue from the skin, using a gentle cleanser suited to one’s skin type. This ensures a clean surface for optimal product absorption.
Toning: Applying a toner after cleansing helps to balance the skin’s pH levels, tighten pores, and prepare the skin for subsequent products.
Moisturizing: A moisturizer hydrates the skin, creating a smooth surface for makeup application and preventing product from clinging to dry patches. Choosing a moisturizer compatible with one’s skin type is crucial for achieving optimal results.
2. Primer: The Unsung Hero of Makeup Application
Primer serves as a vital intermediary between the skin and makeup, providing a smooth and even surface for optimal product application. It helps to minimize the appearance of pores, fine lines, and wrinkles, while also extending the wear of makeup throughout the day.
Types of Primer: Various primers cater to specific skin concerns, ranging from mattifying formulas for oily skin to hydrating options for dry skin. There are also primers designed to minimize the appearance of pores, control shine, or enhance the longevity of foundation.
Application: Primer is typically applied after moisturizer and before foundation. A small amount is sufficient, spread evenly over the face using fingertips or a makeup brush.
3. Foundation: The Building Block of a Flawless Complexion
Foundation serves as the base for a flawless complexion, unifying skin tone and creating an even canvas for subsequent makeup application. It is available in a range of shades and formulas, catering to diverse skin types and preferences.
Choosing the Right Foundation: The key to achieving a natural-looking foundation lies in selecting a shade that closely matches one’s skin tone. Testing foundation on the jawline is a reliable method for finding the perfect match.
Application Techniques: Foundation can be applied using various tools, including brushes, sponges, or even fingertips. The choice depends on personal preference and desired coverage. Using a brush provides a more precise application, while a sponge offers a more natural finish.
4. Concealer: Camouflaging Imperfections
Concealer, a targeted solution for concealing blemishes, dark circles, and other imperfections, enhances the overall complexion. It is available in various shades and formulas, offering varying levels of coverage.
Choosing the Right Concealer: Selecting a concealer shade that complements the foundation is crucial for a seamless finish. Choosing a shade slightly lighter than the foundation can effectively brighten under-eye areas.
Application Techniques: Concealer is typically applied after foundation, focusing on areas requiring targeted coverage. A small amount is sufficient, applied with a brush or sponge, blending carefully into the surrounding skin.
5. Powder: Setting the Stage for Longevity
Powder sets makeup, ensuring a long-lasting and matte finish. It absorbs excess oil, preventing shine and keeping makeup in place throughout the day.
Types of Powder: Loose powder offers a lighter, more natural finish, while pressed powder provides a more concentrated coverage. Setting powder is designed specifically to set makeup, while translucent powder is universally flattering and suitable for all skin tones.
Application Techniques: Powder is typically applied after foundation and concealer, using a brush or sponge. A light dusting is sufficient to set makeup without creating a cakey appearance.
6. Blush: Adding a Flush of Color
Blush adds a natural-looking flush of color to the cheeks, enhancing the overall complexion and adding a touch of vibrancy. It is available in a range of shades, from subtle pinks to vibrant reds, allowing for personalized customization.
Choosing the Right Blush: Selecting a blush shade that complements one’s skin tone is crucial for achieving a natural and flattering look. Experimenting with different shades is encouraged to find a favorite.
Application Techniques: Blush is typically applied to the apples of the cheeks, blending upwards towards the temples. A brush or sponge can be used for application, depending on personal preference.
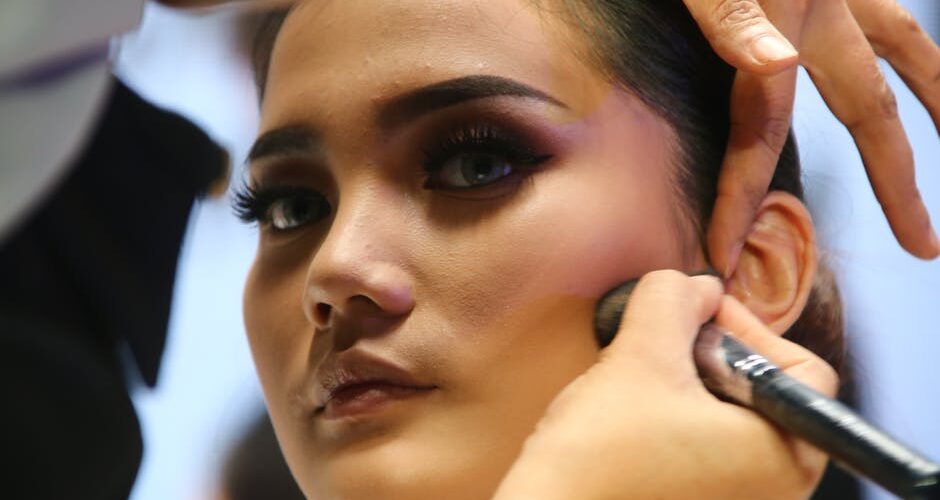
7. Bronzer: Sculpting and Defining
Bronzer adds warmth and definition to the face, creating a sculpted and contoured effect. It is available in a range of shades, from light to deep, catering to diverse skin tones.
Choosing the Right Bronzer: Selecting a bronzer shade that is one or two shades darker than one’s natural skin tone is recommended for a subtle and natural-looking contour.
Application Techniques: Bronzer is typically applied to the hollows of the cheeks, along the hairline, and around the perimeter of the face, blending carefully to create a seamless finish.
8. Eyeshadow: Enhancing and Defining the Eyes
Eyeshadow adds depth, dimension, and color to the eyes, enhancing their natural beauty. It is available in an endless array of colors, textures, and finishes, offering endless creative possibilities.
Choosing the Right Eyeshadow: Selecting eyeshadow shades that complement one’s eye color and skin tone is essential for creating a harmonious look. Experimenting with different shades and textures is encouraged to discover personal preferences.
Application Techniques: Eyeshadow is typically applied to the eyelids, crease, and brow bone, blending carefully to create a seamless transition between shades. Various brushes are available for applying and blending eyeshadow, offering different levels of precision and control.
9. Eyeliner: Defining and Enhancing the Eye Shape
Eyeliner defines the eye shape, enhancing its natural contours and adding a touch of drama. It is available in various colors, textures, and finishes, offering a wide range of stylistic options.
Choosing the Right Eyeliner: Selecting an eyeliner color that complements one’s eye color and desired look is crucial for achieving a harmonious and flattering effect.
Application Techniques: Eyeliner can be applied along the lash line, creating a thin line for a subtle definition or a thicker line for a more dramatic effect. Various tools are available for applying eyeliner, including pencils, liquid liners, and gel liners, each offering unique characteristics and application techniques.
10. Mascara: Enhancing and Defining the Lashes
Mascara enhances the lashes, adding length, volume, and definition, opening up the eyes and creating a more dramatic look. It is available in various colors, textures, and formulas, catering to diverse lash types and desired effects.
Choosing the Right Mascara: Selecting a mascara formula that complements one’s lash type and desired effect is essential for achieving optimal results. Lengthening mascaras focus on extending the lashes, while volumizing mascaras add thickness and fullness.
Application Techniques: Mascara is typically applied to the upper lashes, using a wand to sweep the product from root to tip. Multiple coats can be applied for added volume and definition.
11. Lipstick: Adding a Touch of Color and Glamour
Lipstick completes the makeup look, adding a touch of color and glamour to the lips. It is available in a vast array of colors, textures, and finishes, allowing for endless creative possibilities.
Choosing the Right Lipstick: Selecting a lipstick shade that complements one’s skin tone and personal style is essential for achieving a flattering and harmonious look.
Application Techniques: Lipstick can be applied directly to the lips using a bullet, brush, or finger. For a more precise application, using a lip liner to define the lip shape beforehand is recommended.
12. Setting Spray: Sealing the Deal
Setting spray is the final touch, ensuring a long-lasting and flawless finish. It helps to set makeup, preventing it from smudging or fading throughout the day.
Types of Setting Spray: Setting sprays are available in various formulas, ranging from matte finishes for oily skin to dewy finishes for dry skin. Some setting sprays also offer additional benefits, such as hydrating or smoothing the skin.
Application Techniques: Setting spray is typically applied after all other makeup products, holding the bottle approximately 10 inches away from the face and misting evenly. Allow the spray to dry completely before touching the face.
FAQs by Makeup Steps in Order for Face
1. Preparation:
-
What is the best way to cleanse my face before applying makeup?
- The best way to cleanse your face is to choose a gentle cleanser suited to your skin type. Avoid harsh soaps or scrubs that can irritate the skin.
-
Should I use a toner after cleansing?
- Using a toner after cleansing helps to balance the skin’s pH levels and prepare it for subsequent products.
-
What kind of moisturizer should I use?
- Choose a moisturizer that is compatible with your skin type, whether it be oily, dry, or combination.
2. Primer:
-
Is primer really necessary?
- Primer is not strictly necessary, but it can significantly enhance the longevity and overall appearance of makeup.
-
How do I choose the right primer for my skin type?
- There are various primers designed for different skin types, ranging from mattifying formulas for oily skin to hydrating options for dry skin.
-
How much primer should I use?
- A small amount of primer is sufficient, spread evenly over the face using fingertips or a makeup brush.
3. Foundation:
-
How do I find the right foundation shade for my skin?
- Testing foundation on the jawline is a reliable method for finding the perfect match.
-
What is the best way to apply foundation?
- Foundation can be applied using various tools, including brushes, sponges, or even fingertips. The choice depends on personal preference and desired coverage.
-
How do I achieve a natural-looking foundation finish?
- Using a sponge or a brush with a light touch can help achieve a more natural finish.
4. Concealer:
-
What is the best way to apply concealer?
- Concealer is typically applied after foundation, focusing on areas requiring targeted coverage. A small amount is sufficient, applied with a brush or sponge, blending carefully into the surrounding skin.
-
How do I choose the right concealer shade?
- Selecting a concealer shade that complements the foundation is crucial for a seamless finish. Choosing a shade slightly lighter than the foundation can effectively brighten under-eye areas.
-
Can I use concealer to contour?
- While concealer can be used for contouring, it is generally recommended to use a dedicated contour product for more defined results.
5. Powder:
-
What type of powder should I use?
- Loose powder offers a lighter, more natural finish, while pressed powder provides a more concentrated coverage. Setting powder is designed specifically to set makeup, while translucent powder is universally flattering and suitable for all skin tones.
-
How much powder should I use?
- A light dusting of powder is sufficient to set makeup without creating a cakey appearance.
-
Can I use powder to set my eyeshadow?
- Yes, you can use a translucent powder to set your eyeshadow, preventing creasing and extending its wear.
6. Blush:
-
How do I choose the right blush shade?
- Selecting a blush shade that complements one’s skin tone is crucial for achieving a natural and flattering look. Experimenting with different shades is encouraged to find a favorite.
-
Where should I apply blush?
- Blush is typically applied to the apples of the cheeks, blending upwards towards the temples.
-
Can I use blush as an eyeshadow?
- Yes, you can use blush as an eyeshadow, especially for a soft and natural look.
7. Bronzer:
-
How do I choose the right bronzer shade?
- Selecting a bronzer shade that is one or two shades darker than one’s natural skin tone is recommended for a subtle and natural-looking contour.
-
Where should I apply bronzer?
- Bronzer is typically applied to the hollows of the cheeks, along the hairline, and around the perimeter of the face, blending carefully to create a seamless finish.
-
Can I use bronzer as an eyeshadow?
- Yes, you can use bronzer as an eyeshadow, especially for a warm and neutral look.
8. Eyeshadow:
-
How do I choose the right eyeshadow shades?
- Selecting eyeshadow shades that complement one’s eye color and skin tone is essential for creating a harmonious look. Experimenting with different shades and textures is encouraged to discover personal preferences.
-
What are the different types of eyeshadow brushes?
- Various brushes are available for applying and blending eyeshadow, offering different levels of precision and control.
-
How do I create a smoky eye look?
- To create a smoky eye look, use a blend of dark and light eyeshadow shades, applying them to the crease and eyelid, blending carefully to create a seamless transition.
9. Eyeliner:
-
What are the different types of eyeliner?
- Various tools are available for applying eyeliner, including pencils, liquid liners, and gel liners, each offering unique characteristics and application techniques.
-
How do I apply eyeliner for a winged effect?
- To create a winged effect, start by applying a thin line along the lash line and then extend the line upwards at an angle, creating a wing shape.
-
Can I use eyeshadow as eyeliner?
- Yes, you can use eyeshadow as eyeliner, especially for a soft and diffused look.
10. Mascara:
-
What is the difference between lengthening and volumizing mascara?
- Lengthening mascaras focus on extending the lashes, while volumizing mascaras add thickness and fullness.
-
How do I apply mascara without smudging?
- To prevent smudging, apply mascara in light coats, allowing each coat to dry before applying the next.
-
Can I use mascara on my lower lashes?
- Yes, you can use mascara on your lower lashes, but use a light hand to avoid creating a clumpy effect.
11. Lipstick:
-
How do I choose the right lipstick shade?
- Selecting a lipstick shade that complements one’s skin tone and personal style is essential for achieving a flattering and harmonious look.
-
What are the different types of lipstick finishes?
- Lipstick finishes range from matte to glossy, offering a variety of effects.
-
Can I use lipstick as a blush?
- Yes, you can use lipstick as a blush, especially for a natural and vibrant look.
12. Setting Spray:
-
What is the best way to apply setting spray?
- Setting spray is typically applied after all other makeup products, holding the bottle approximately 10 inches away from the face and misting evenly. Allow the spray to dry completely before touching the face.
-
How often should I reapply setting spray throughout the day?
- Reapplying setting spray throughout the day can help to keep makeup fresh and prevent it from fading.
-
What are the benefits of using setting spray?
- Setting spray helps to set makeup, preventing it from smudging or fading throughout the day. It can also provide additional benefits, such as hydrating or smoothing the skin.
Tips by Makeup Steps in Order for Face
1. Preparation:
- Exfoliate regularly: Exfoliating the skin once or twice a week helps to remove dead skin cells, creating a smoother surface for makeup application.
- Use a cold compress: Applying a cold compress to the face before makeup application can help to reduce puffiness and tighten pores.
- Hydrate from within: Drinking plenty of water helps to keep the skin hydrated and supple, creating a more even canvas for makeup application.
2. Primer:
- Apply primer to specific areas: If you have oily skin, apply primer only to your T-zone, focusing on areas prone to shine.
- Use a primer with SPF: If you’re using primer during the day, choose one with SPF to protect your skin from the sun’s harmful rays.
- Experiment with different primers: There are various primers available, so experiment to find one that works best for your skin type and concerns.
3. Foundation:
- Use a foundation brush for a more precise application: A foundation brush can help to create a more even and natural-looking finish.
- Blend carefully: Blending foundation well is crucial for a seamless and natural-looking finish.
- Don’t forget your neck and décolletage: Applying foundation to these areas can help to create a more unified and polished look.
4. Concealer:
- Use a concealer brush for more targeted coverage: A concealer brush can help to apply concealer precisely to specific areas.
- Set concealer with powder: Setting concealer with powder can help to prevent creasing and extend its wear.
- Use a lighter concealer shade to highlight: Applying a lighter concealer shade to the inner corners of the eyes and brow bone can help to brighten and lift the face.
5. Powder:
- Use a large powder brush for a light dusting: A large powder brush can help to apply powder evenly and prevent a cakey finish.
- Apply powder in thin layers: Applying powder in thin layers can help to prevent a heavy or powdery appearance.
- Use powder to set your lipstick: Setting your lipstick with powder can help to extend its wear and prevent bleeding.
6. Blush:
- Smile while applying blush: Smiling while applying blush helps to ensure that it is applied to the apples of the cheeks, creating a natural-looking flush.
- Use a blush brush with a soft, fluffy tip: A blush brush with a soft, fluffy tip can help to blend blush seamlessly into the skin.
- Apply blush in a circular motion: Applying blush in a circular motion can help to create a more natural-looking flush.
7. Bronzer:
- Use a bronzer brush with a long, angled handle: A bronzer brush with a long, angled handle can help to apply bronzer precisely to the hollows of the cheeks and along the hairline.
- Blend carefully: Blending bronzer well is crucial for a seamless and natural-looking finish.
- Use bronzer to add warmth to the face: Applying bronzer to the forehead, nose, and chin can help to create a more sculpted and defined look.
8. Eyeshadow:
- Use a blending brush to create a seamless transition between shades: A blending brush can help to soften harsh lines and create a more natural-looking eye look.
- Start with a light shade and work your way up to darker shades: This technique can help to create a more balanced and harmonious eye look.


Closure
Thus, we hope this article has provided valuable insights into Mastering the Art of Facial Makeup: A Comprehensive Guide to Achieving a Flawless Look. We thank you for taking the time to read this article. See you in our next article!